What is Porcupine?
Porcupine is a software package that offers a graphical user interface (GUI) to
build reproducible analysis pipelines for (f)MRI data. In Porcupine, you can
create analysis pipelines by connecting “nodes” (analysis operations) to
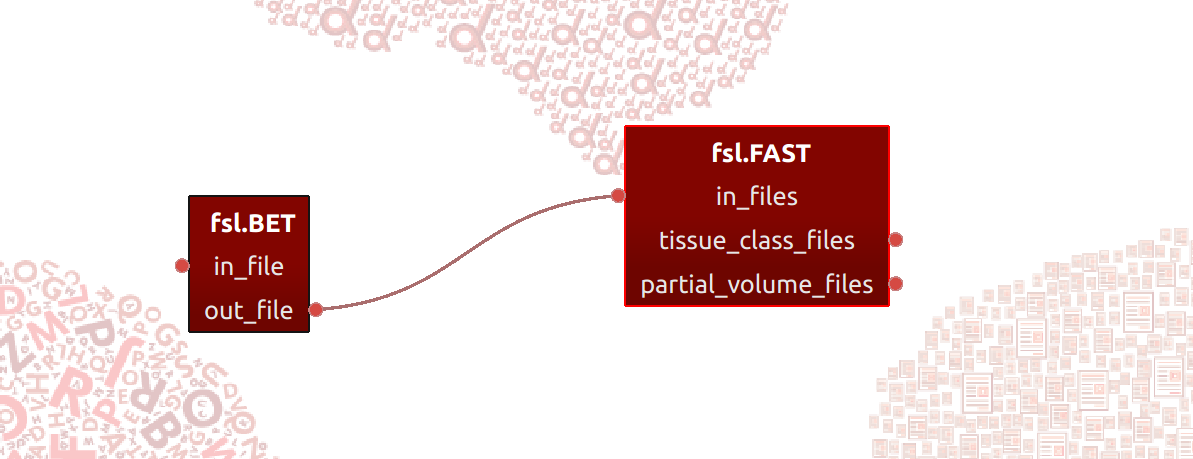
each other. For example, one could create a preprocessing pipeline for structural
MRI, in which a “skullstripping node” (e.g. FSL’s BET or AFNI’s 3dSkullstrip)
is connected to a “segmentation node” (e.g. FSL’s FAST or SPM’s NewSegment).
Why Porcupine?
While there are existing pipeline packages (such as LONI and Nipype), these packages often require extensive technical knowledge and skills, which makes it difficult for researchers unfamiliar with these computational practices to start building analysis pipelines. However, describing one’s analysis pipeline in code is essential in improving transparency and reproducibility in (neuro)science.
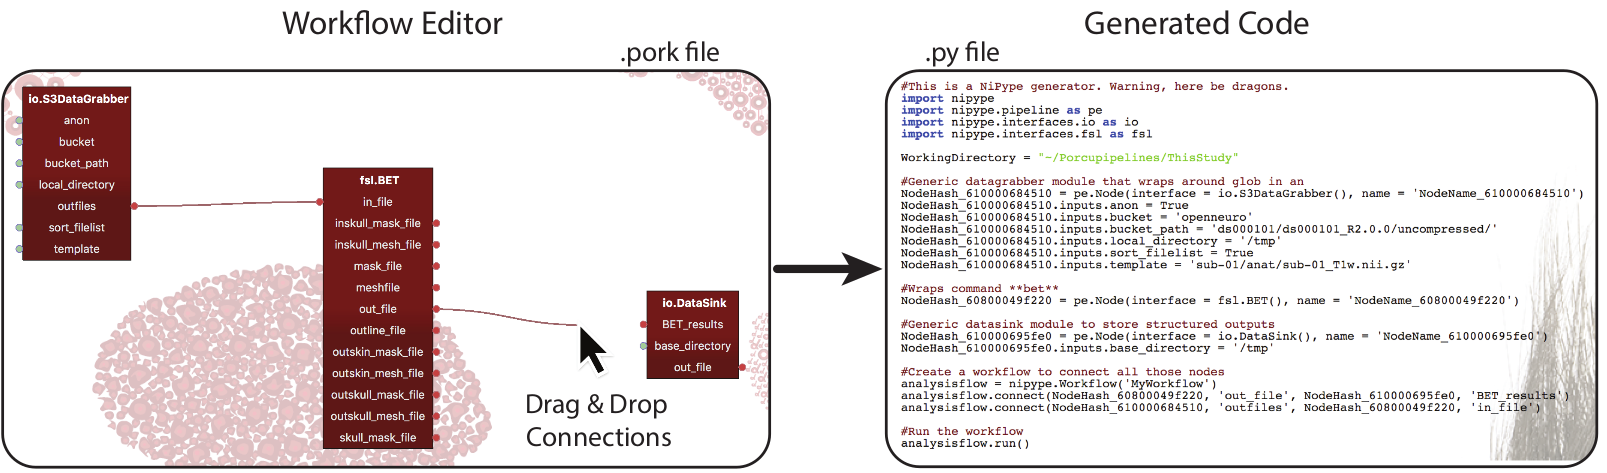
Porcupine provides the best of both worlds: while it allows researchers to build pipelines using Porcupine’s GUI, it also generates the code that is needed to run the pipeline created in the GUI. Currently, Porcupine supports two pipeline-frameworks: Nipype, a Python-based pipelining package, and my own Laminar Analysis Toolbox.
In the image below, you can see the Porcupine-workflow (left) and the Porcupine-generated Nipype code (right) side-by-side.
Porcupine improves reproducibility
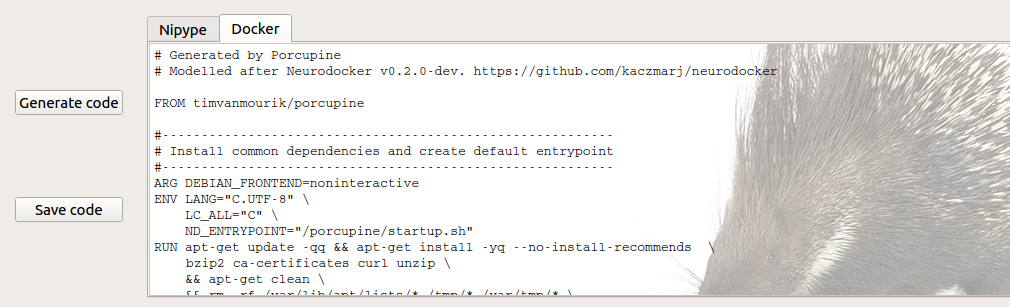
For Nipype-based pipelines, Porcupine doesn’t only create the code corresponding to your pipeline, but also a Dockerfile that complements your pipeline. Building this Dockerfile creates a Docker-image that - together with your Porcupine-generated code - makes your pipeline completely reproducible from beginning to end.
Get started!
To get started with building pipelines in Porcupine, download and install Porcupine first. We provide installers for Windows and Mac OS. Then, check out our example gallery for inspiration or check out our documentation for more information on how to work with Porcupine. If you’re interested in more background information of Porcupine, take a look at this presentation!
Beware! On Mac, there is a chance that you can get a pop-up that Porcupine does not want to open straight away, depending on your security settings. Your Mac might not like apps that do not come straight out of the app store. You can eaily open Porcupine by going to ‘System Preference’ -> ‘Security & Privacy’ and click on ‘Open Anyway’