The code editor
Perhaps Porcupine’s coolest feature is that it automatically generates the code
necessary to actually run your pipeline. This bring us to Porcupine’s
“code editor”, located below the workflow editor. Once you have defined your
pipeline using the workflow and node editor, simply click the Generate code
button left of the code editor, and you’re done!
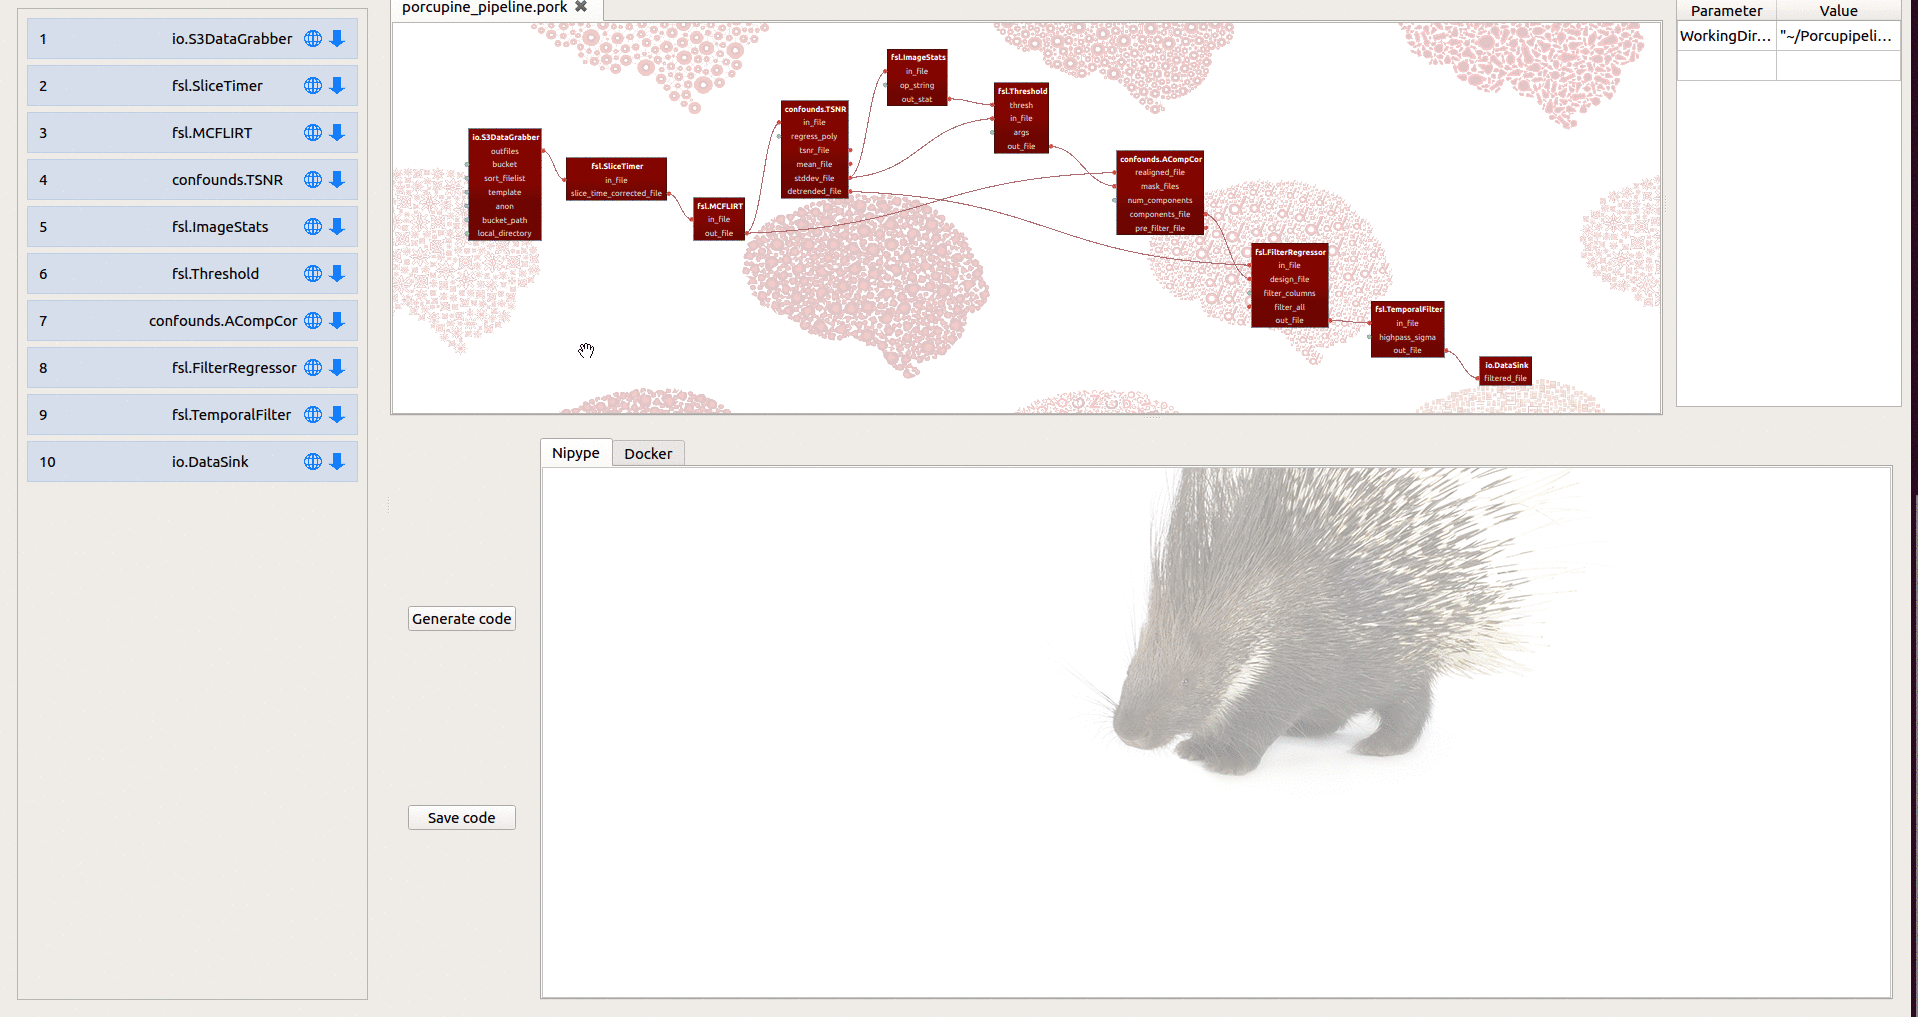
Generating Nipype-based Python scripts
After pressing “Generate code”, you’ll see that Porcupine creates a Python
script under the Nipype-tab in the code editor. In this script, all the
necessary imports, initialization of nodes, connection between nodes, and
the actual call to execute the pipeline (or “workflow”, in Nipype-terms) are
properly defined. In other words, you can just save the script (using the “Save code”
button) as a Python-file (e.g. my_pipeline.py) and run it in your terminal
(i.e. python my_pipeline.py)!
Of course, you can edit the script to your own liking before saving if you want!
For example, we set the workflow-plugins
by default to Multiproc with a single core (which will run the pipeline serially),
but you could edit this directly in the code editor to use a different plugin or
more cores!
Generating Dockerfiles
In addition to generating the code necessary for running your pipeline, Porcupine also generates a “Dockerfile”. A Dockerfile is a file that specifies how the software package Docker should build a virtual (“containerized”) operating system in which all the dependencies to run your pipeline are installed. In other words, a Dockerfile is like a recipe, specifing all “ingredients” (dependencies) needed to run your pipeline.
For example, suppose you’ve build a skullstripping pipeline for T1-weighted images, in which you use ANTs for bias correction, AFNI for skullstripping, and FSL to threshold the brain-mask (like our example pipeline based on a pipeline from the niworkflows package). Accordingly, Porcupine will then add the software packages ANTs, AFNI, and FSL (the “ingredients”) to the Dockerfile, such that other people can evaluate your pipeline in a fully replicable environment specified in your Dockerfile! Again, you only need to press “Generate code”, select the “Docker” tab in the code editor, and save your file (using the “Save code” button; best to name the file simply “Dockerfile”, as this is convention).
For more information on Porcupine’s Dockerfile generator, check out the section on building dockerfiles in our documentation.
By now, we’ve discussed the three major “editors” in Porcupine necessary to build your pipeline: the workflow editor, the node editor, and the code editor. The next section of the documentation is about the “parameter editor”, a somewhat less “important” window in Porcupine, but which can help you organize the hard-coded variables in your pipeline.